We’re a small, premium shop—not a chain. Every customer gets tailored advice, curated gear, and real service from mountain-savvy staff who know your sport.
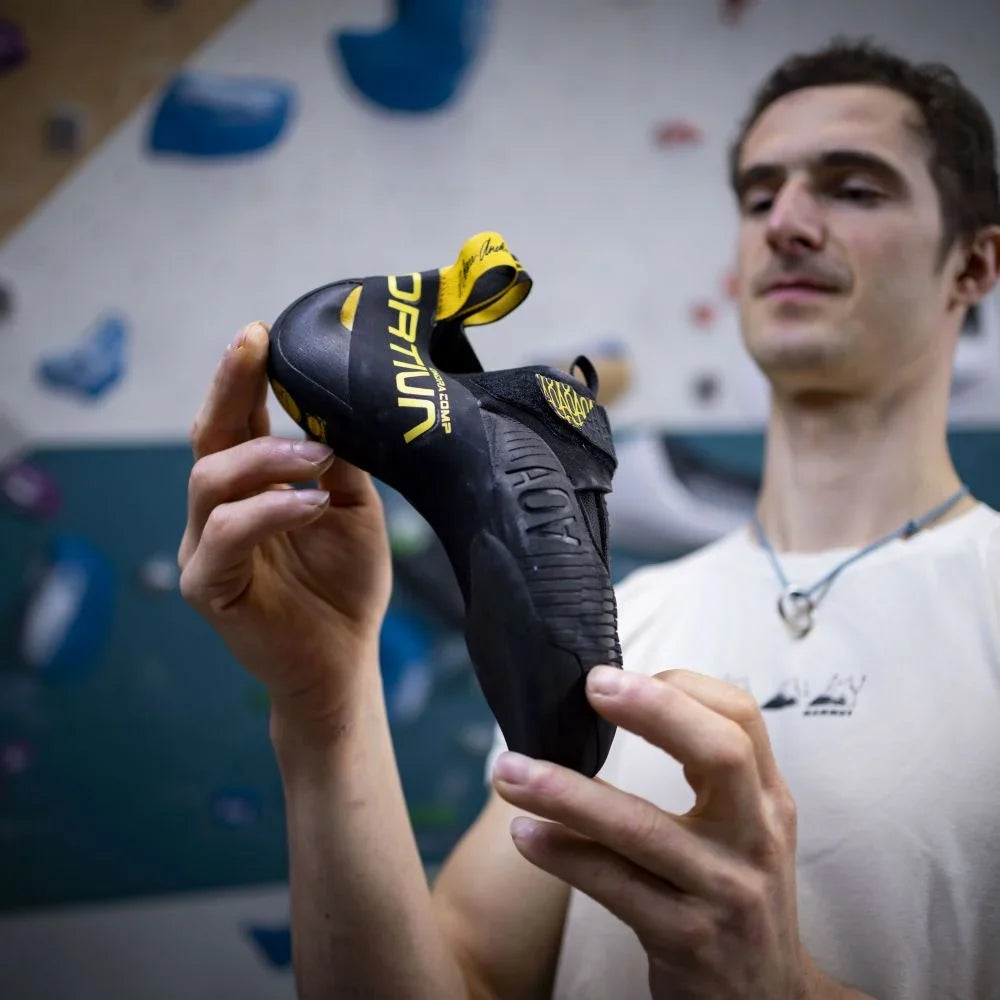
Real Expertise
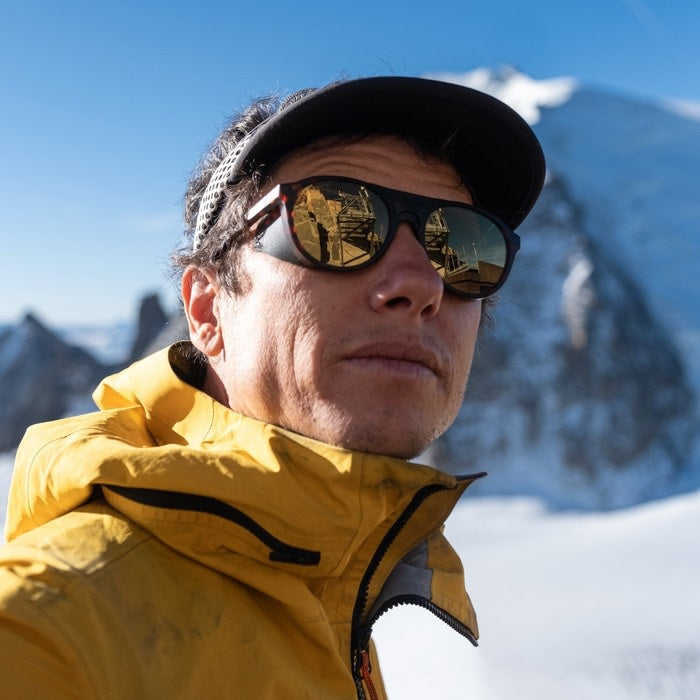
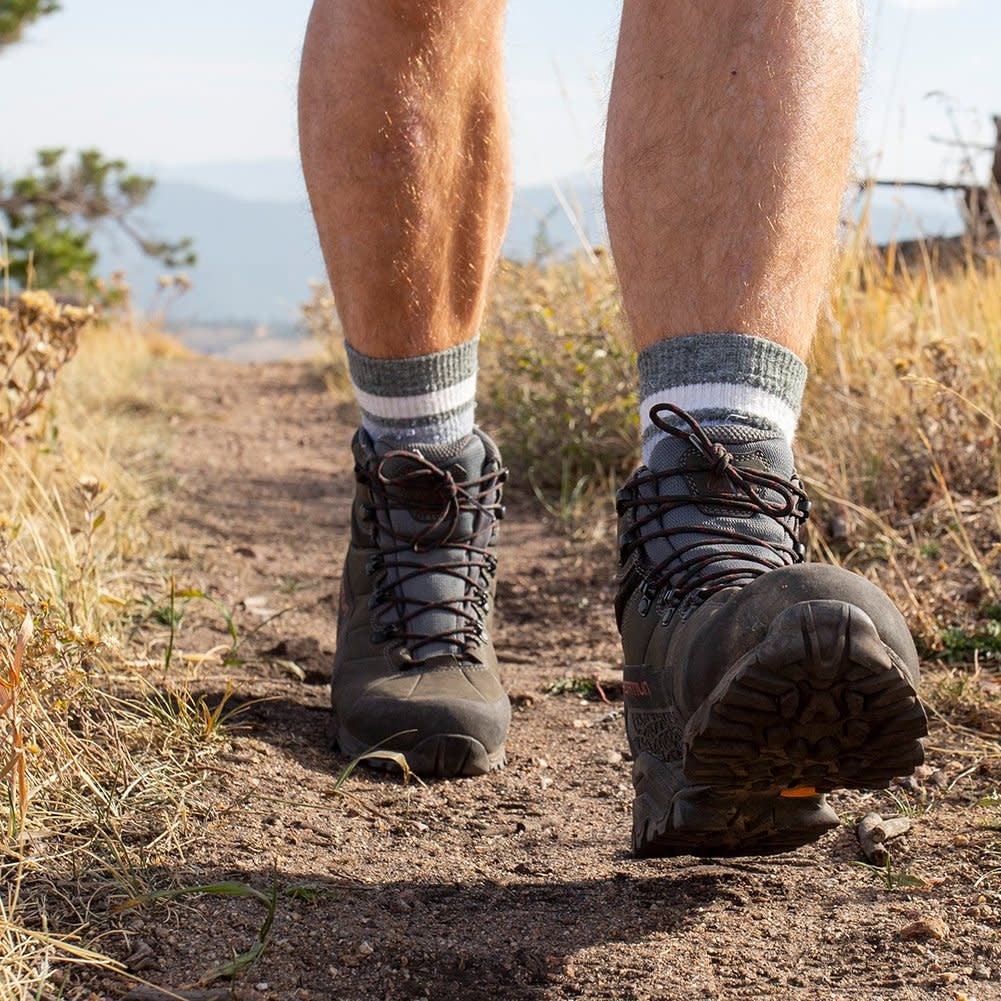
We live the mountain life—so our advice comes from real experience, not sales scripts.
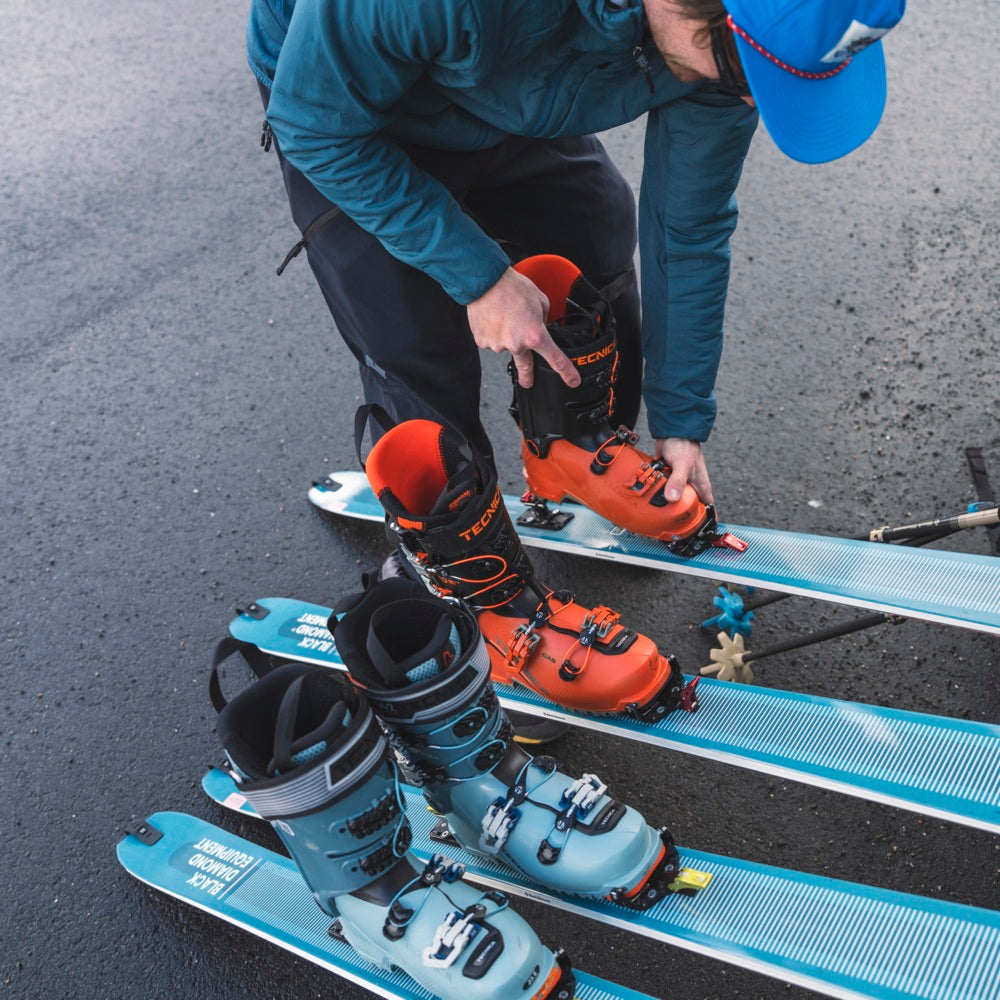
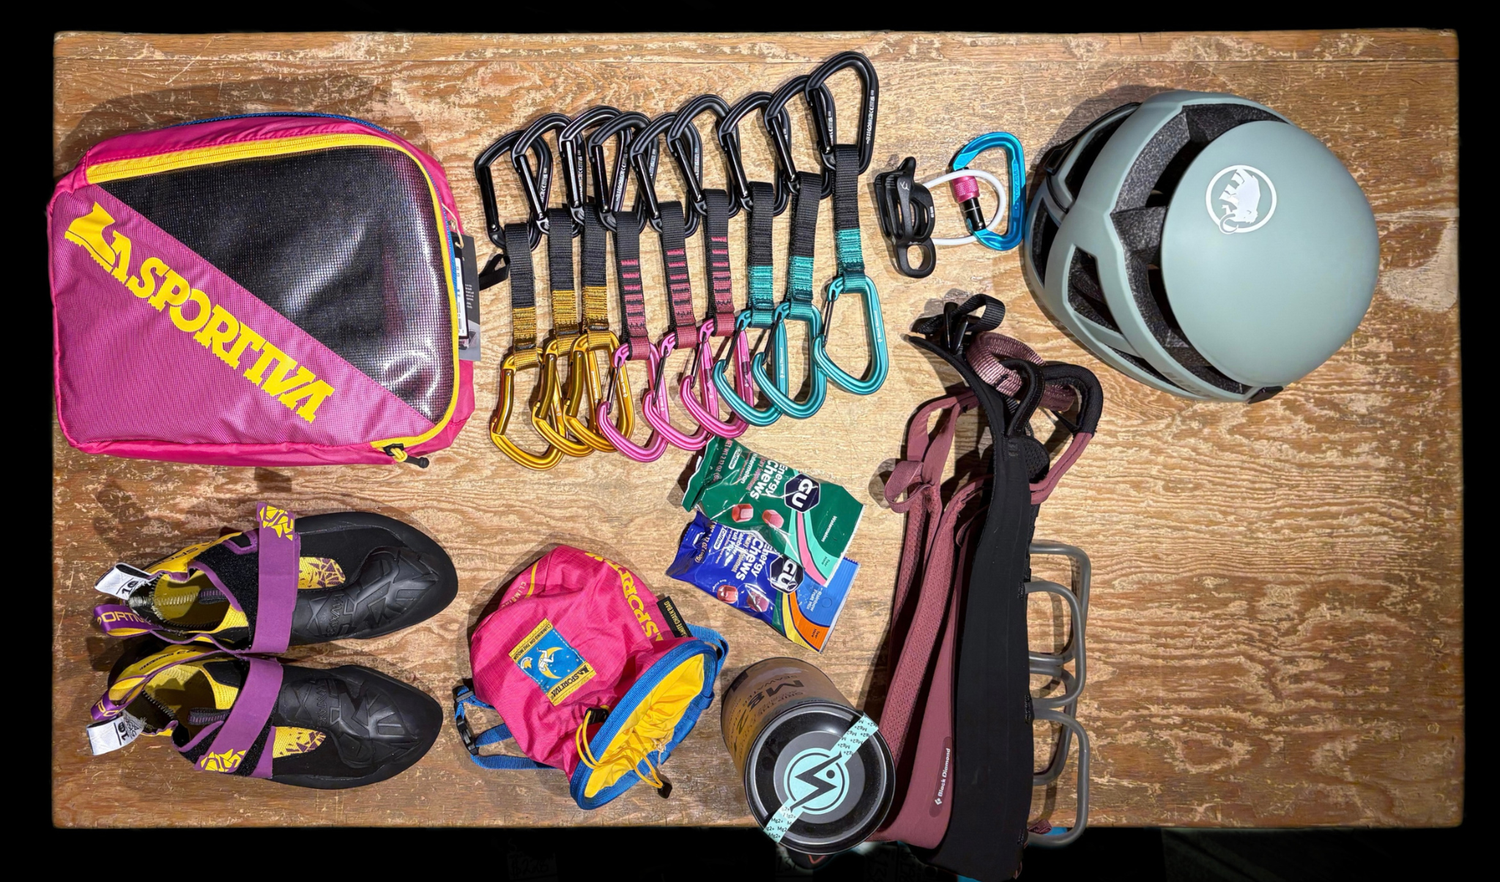
Curated Gear
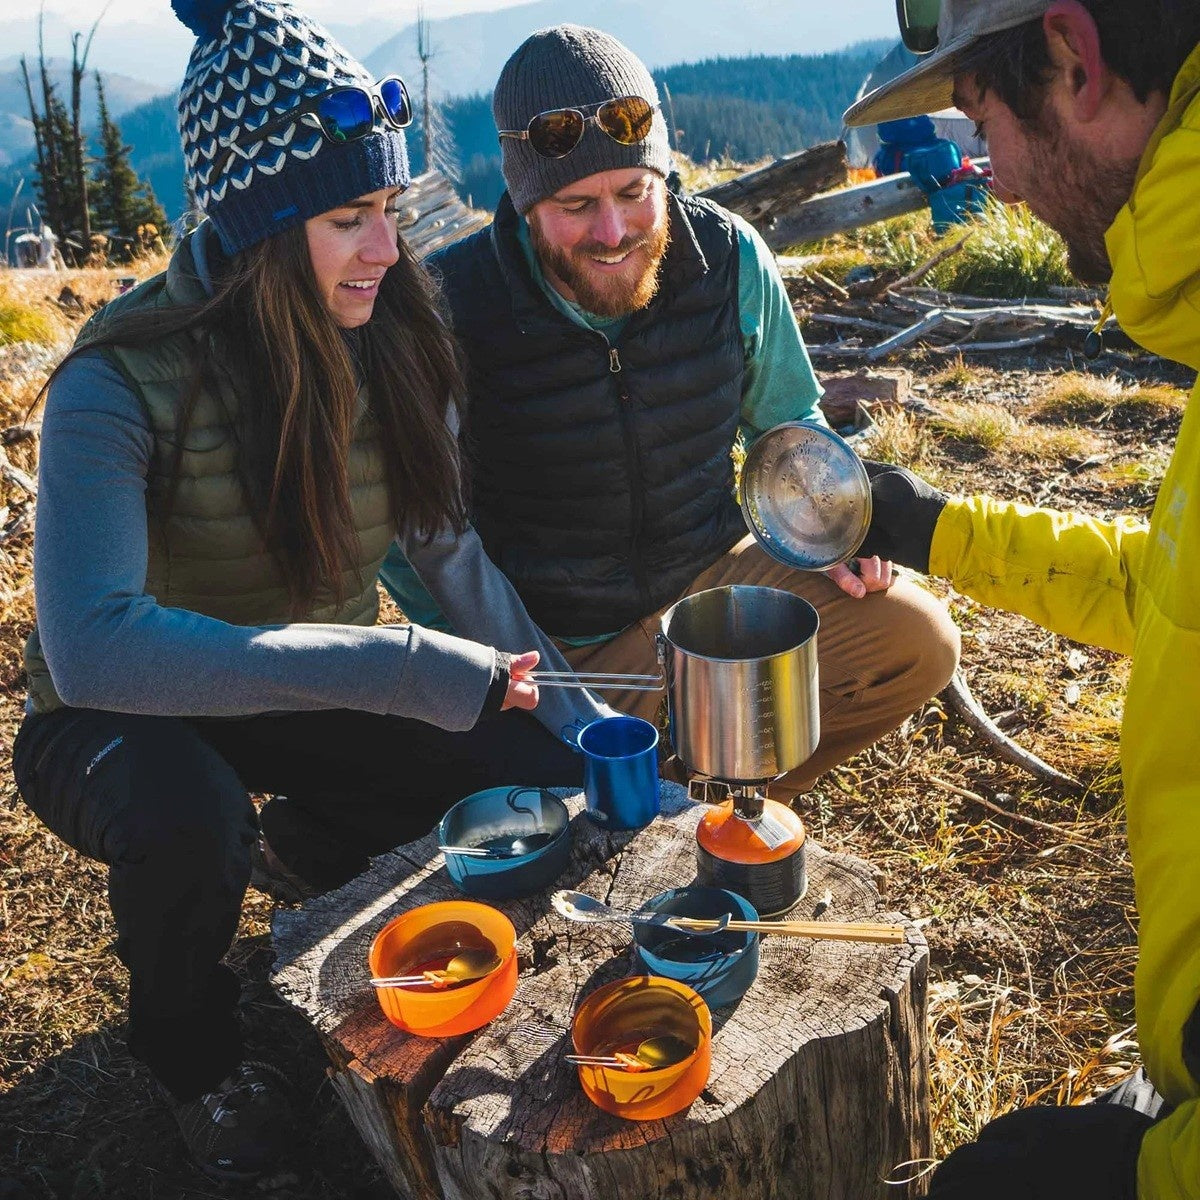
Every item is handpicked for quality and performance—no bulk, no fluff.
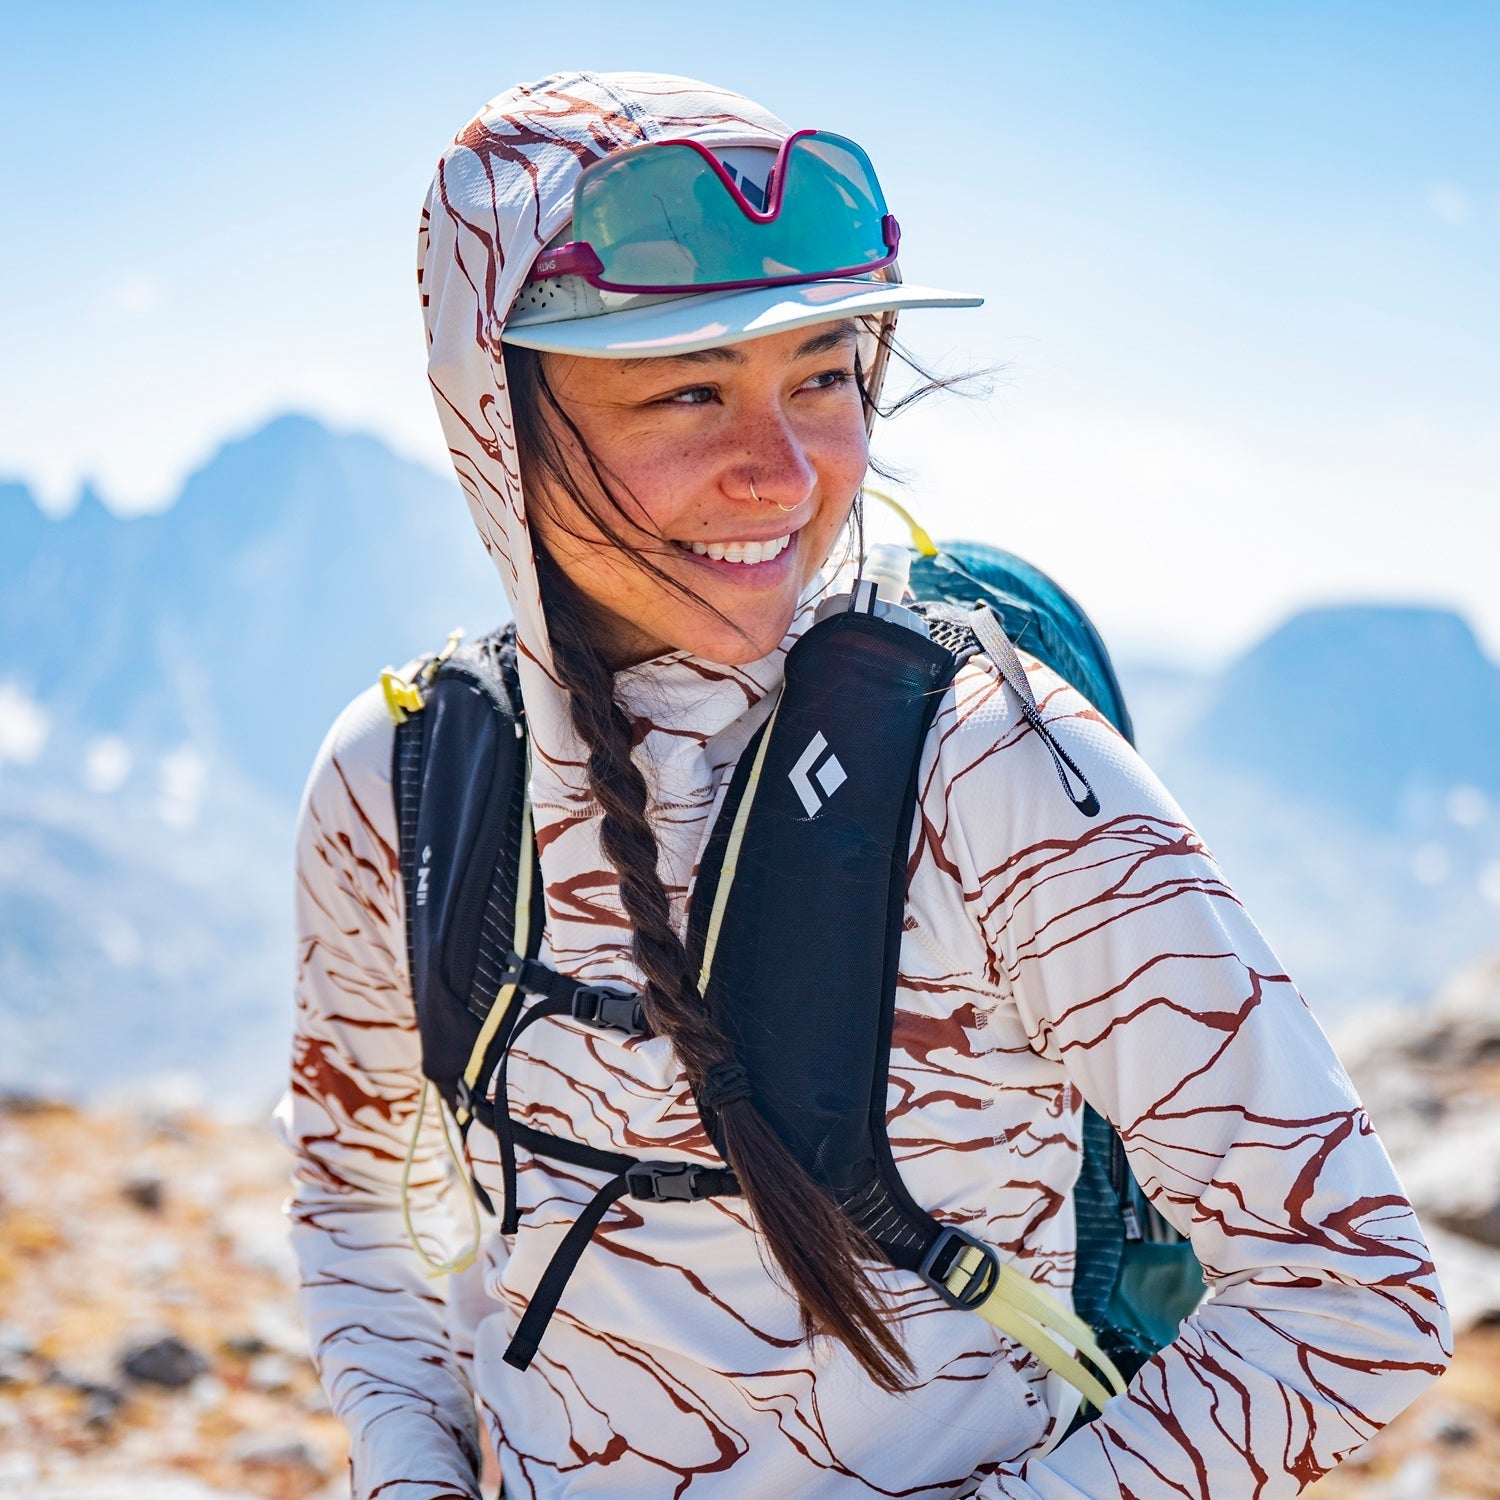
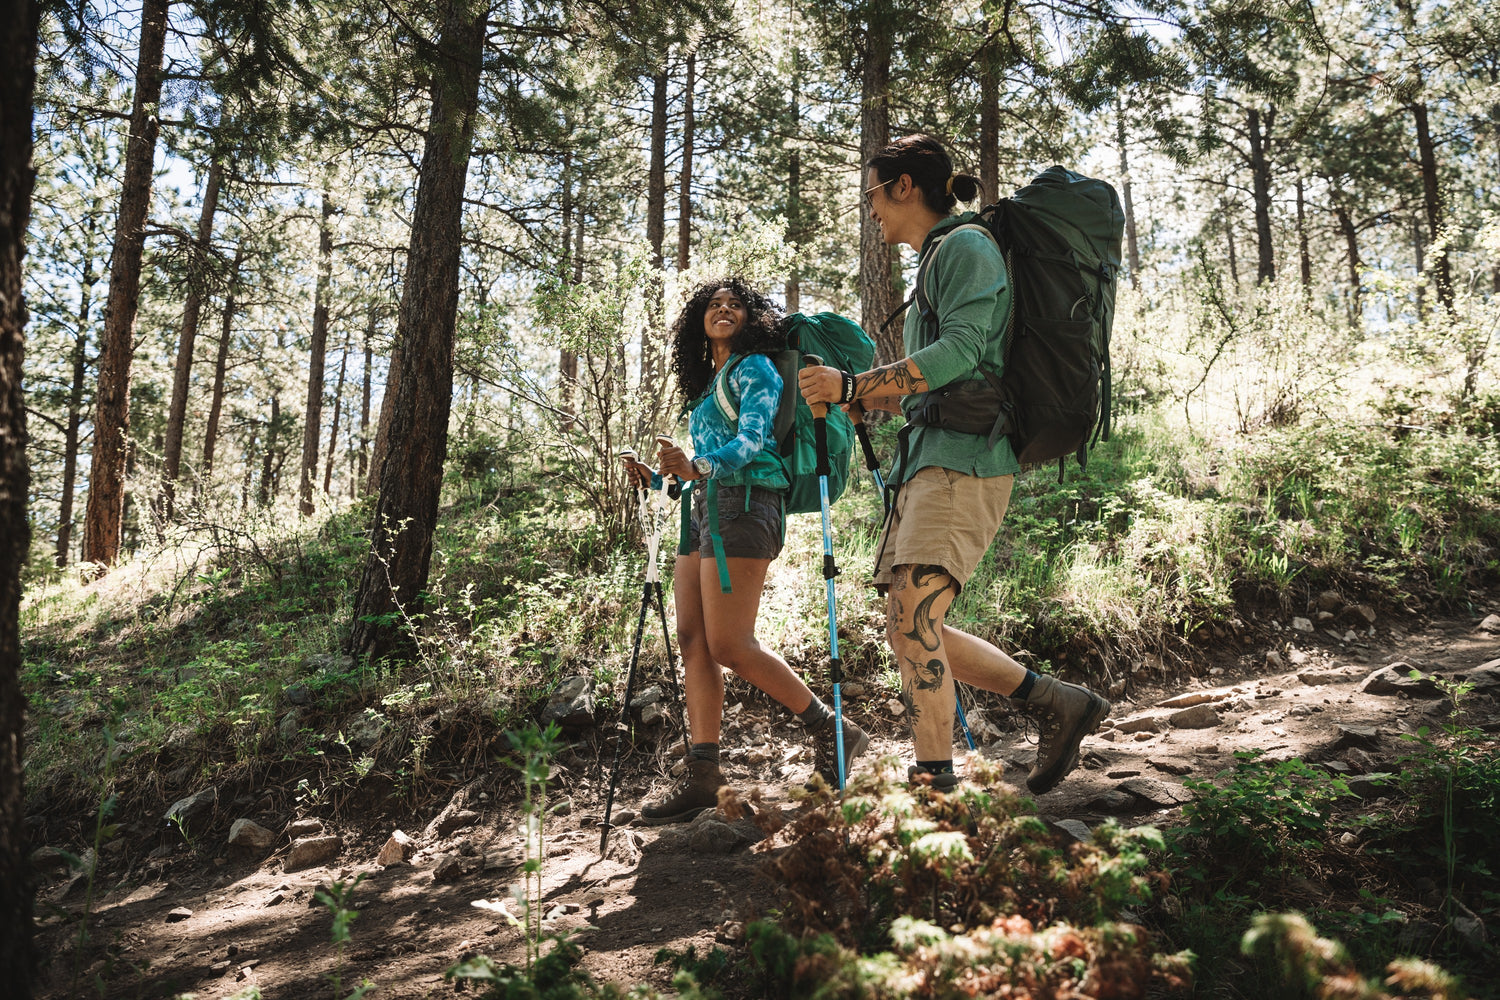
Small Shop, Big Heart
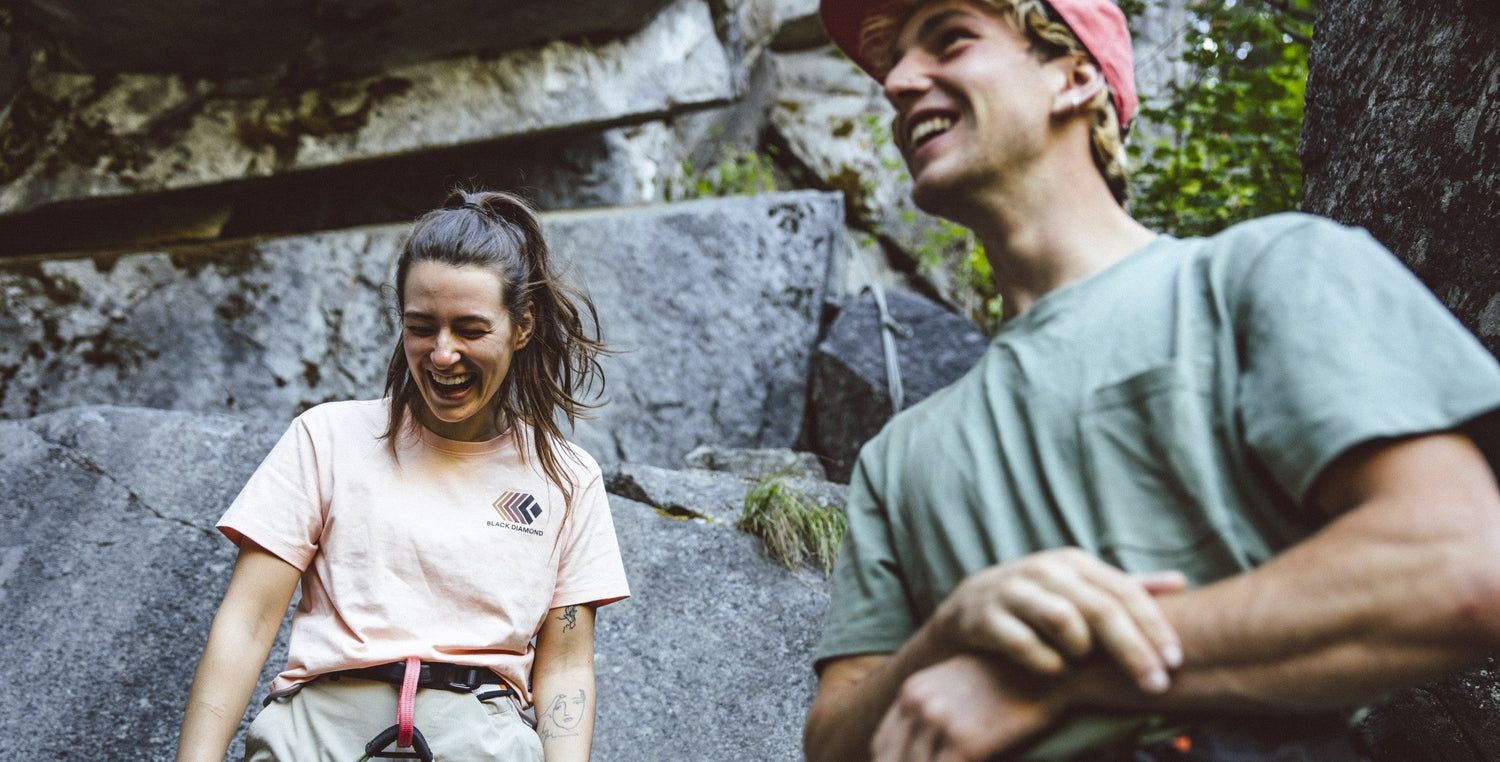
We’re local, independent, and here for the community. Your support matters.
If you're researching alpine touring bindings, you've likely encountered two terms that seem to be used interchangeably: "pin bindings" and "tech bindings." This can create confusion for newcomers to backcountry skiing, especially when trying to understand what sets these bindings apart from traditional alpine bindings or frame bindings. The truth is simpler than you might think, but understanding the nuances helps you make better decisions about your touring setup. This comprehensive guide will clarify the terminology, explain how these bindings work, and help you understand whether they're the right choice for your backcountry adventures.
Pin Bindings and Tech Bindings: The Same Thing
Let's address the central question immediately: pin bindings and tech bindings are the same thing. These terms are used interchangeably throughout the ski industry, with "tech" being short for "tech fittings" or "technical bindings," while "pin" refers to the metal pins that connect the boot to the binding. You might also hear them called "pin-tech bindings" or simply "touring bindings," though the latter term can technically include frame bindings as well.
The terminology dates back to the original invention of this binding system by Dynafit in 1986, when they introduced what they called "Low Tech" bindings. The name referred to the mechanically simple design that used pins instead of the complex mechanical systems found in alpine bindings. As the patent expired in 2012 and competitors entered the market, various names emerged, but they all describe the same fundamental technology.
When you're shopping or researching, don't worry about distinguishing between pin and tech bindings—they're identical. What matters more is understanding how they differ from frame bindings and traditional alpine bindings, and whether this style suits your skiing needs.
How Pin/Tech Bindings Work
Understanding the mechanics of pin bindings helps explain why they've revolutionized backcountry skiing and why they differ so fundamentally from other binding types.
The Pin Connection System
At the heart of every tech binding is a simple but elegant pin system. The toe piece features two small metal pins mounted on spring-loaded arms. These pins insert into metal fittings (tech inserts or tech fittings) that are integrated into the toe of compatible touring boots. When you step into the binding, the pins click into these fittings, securing your boot to the ski at the toe.
The heel piece operates similarly, with two parallel pins that slot into fittings at the back of your boot when you're ready to ski downhill. During uphill travel, the heel pins disengage completely, allowing your heel to lift freely while staying connected only at the toe.
This pin-based connection uses dramatically less material than traditional bindings, resulting in significant weight savings. A complete tech binding might weigh 300-700 grams per binding, compared to 1,500-3,000 grams for frame bindings or alpine bindings.
Tour Mode vs. Ski Mode
The genius of tech bindings lies in their dual functionality. In tour mode, you're connected to the ski only at the toe. As you stride uphill, your heel lifts naturally, with the boot pivoting around the pin connection at the toe. This pivot point sits very close to the ball of your foot, creating a natural walking motion that feels remarkably similar to regular walking or hiking.
Most tech bindings offer heel risers—small flip-up platforms that elevate your heel on steep climbs. These risers typically provide two or three height options, allowing you to adjust your stance angle based on terrain steepness. Many bindings also offer a flat or zero-riser mode for gentle terrain or skating movements.
Transitioning from tour to ski mode typically takes just seconds. You rotate the heel piece (usually 90 degrees), which moves the heel pins into position to accept your boot. Step down into the heel pins, and you're locked in for the descent. The speed and simplicity of this transition becomes increasingly valuable as you gain experience, especially when switching modes on exposed ridgelines or in challenging weather.
Release Mechanisms
Release characteristics represent one of the most significant differences between tech bindings and alpine bindings, and it's an area that requires careful understanding for safety reasons.
Traditional tech bindings feature fixed toe retention, typically equivalent to about DIN 10-12 on an alpine binding. This means the toe doesn't release until substantial force is applied, and you cannot adjust this retention value. The heel piece, by contrast, usually offers adjustable vertical and horizontal release values that you can tune to your weight, ability, and preferences.
This release setup differs fundamentally from alpine bindings, where both toe and heel release in multiple directions according to standardized DIN values. Tech bindings release primarily at the heel in both vertical (upward) and horizontal (twisting) directions. The fixed high retention at the toe provides stability during aggressive skiing but can be problematic in certain fall scenarios.
Some newer tech bindings have addressed these concerns with innovations like rotating toe pieces or adjustable toe retention, bringing their release characteristics closer to alpine standards. These advancements have earned certain models TÜV certification to the ISO 13992:2007 standard for alpine touring bindings, though this differs from the ISO 9462 standard that governs alpine bindings.
Advantages of Pin/Tech Bindings
The dominance of tech bindings in the backcountry skiing market stems from several compelling advantages that make them the preferred choice for most touring applications.
Exceptional Weight Savings
Weight reduction is the most immediately obvious benefit of tech bindings. Compared to frame bindings, you're typically saving 1-2 kilograms per pair—weight that would otherwise be lifting with every single step on the skin track. Over the course of a tour involving thousands of steps, this weight difference translates to dramatically reduced fatigue.
But the weight advantage extends beyond simple mass. Because tech bindings allow your heel to completely disconnect from the ski during ascent, you're not lifting the binding with each step. With frame bindings, the entire binding assembly stays attached to your boot and lifts with each stride. This "zero-lift weight" characteristic of tech bindings makes uphill travel feel almost effortless by comparison.
For ski mountaineering, long traverses, or multi-day hut trips, weight savings compound their benefits. The less energy you expend climbing, the more you have in reserve for the descent and for managing the challenges and decision-making required in backcountry terrain.
Natural Touring Motion
The pivot point placement in tech bindings creates a remarkably natural walking motion. Because the pins connect very close to where your foot naturally flexes, your stride feels smooth and efficient. Compare this to frame bindings, where the pivot point sits forward of your toes, creating an awkward, slightly unnatural gait that becomes increasingly noticeable on long approaches.
This natural motion reduces strain on your ankles, knees, and hips. Over multiple hours of skinning, the biomechanical efficiency matters tremendously. Many skiers report that switching from frame bindings to tech bindings feels like taking weight off their feet, even beyond the actual mass reduction.
Fast Transitions
Speed matters in alpine environments. Weather changes rapidly, conditions deteriorate, and sometimes you need to move quickly between uphill and downhill modes. Tech bindings excel at quick transitions, with most designs allowing mode changes in under 10 seconds without removing your skis.
This efficiency becomes crucial on technical ridgelines, during avalanche-prone periods when minimizing exposure time matters, or on long traverses with multiple transitions. Frame bindings, by contrast, often require removing skis to transition, adding time and complexity to each mode change.
Low Profile and Stand Height
Tech bindings sit very low on the ski, keeping your boot close to the snow surface. This low stand height improves stability, edge control, and overall ski feel. You're positioned more directly over your skis, which enhances power transfer and responsiveness.
Frame bindings, especially older models, can have stand heights of 40-50mm or more. This elevated position makes skis feel less stable and responsive, particularly in variable snow conditions or on firm surfaces.
Boot Compatibility with Modern Designs
While tech bindings require boots with tech fittings (which we'll discuss later), this requirement has become less restrictive over time. Modern touring boot manufacturers have incorporated tech inserts even into relatively stiff, freeride-oriented boots. Five years ago, choosing tech bindings often meant sacrificing boot performance for compatibility. Today, you can find stiff, powerful boots with excellent walk modes that work perfectly with tech bindings.
Disadvantages and Limitations of Pin/Tech Bindings
Despite their advantages, tech bindings come with legitimate drawbacks that matter for certain users and applications. Understanding these limitations helps you make informed choices about whether tech bindings are appropriate for your skiing.
Downhill Performance Compromises
The same lightweight design that makes tech bindings excel uphill creates challenges on the descent. With only four small pins connecting your boot to the binding, the connection inherently offers less stability and power transfer than the broad, secure platform of an alpine or frame binding.
In soft snow and powder, this limitation rarely matters. Most skiers find tech bindings perfectly adequate for powder skiing and general backcountry descents. However, in firm conditions, crud, or chop, tech bindings transmit more vibration directly to your feet and provide less damping. The skiing experience feels harsher and less controlled compared to alpine bindings.
The heel connection in traditional tech bindings also allows some lateral movement—a side-to-side play that alpine bindings eliminate. This play becomes noticeable during hard carving or aggressive skiing, creating a less precise, slightly disconnected feel. Some skiers describe it as the binding "chattering" or feeling "washy" in certain conditions.
Release Consistency Concerns
The fixed toe retention and different release mechanisms in traditional tech bindings create less predictable release behavior than DIN-certified alpine bindings. In certain fall scenarios, particularly those involving lateral forces at slow speeds, tech bindings may not release as consistently as alpine bindings.
This inconsistency has led to ongoing debates about tech binding safety. Proponents note that serious injuries while using tech bindings remain relatively rare, and experienced backcountry skiers have used them safely for decades. Critics point out that the lack of standardized testing and lateral toe release increases risk, particularly for less experienced skiers or those who split time between resort and backcountry skiing.
The reality is nuanced. For experienced backcountry skiers who understand the bindings' limitations and ski accordingly, tech bindings provide adequate safety. For skiers transitioning from resort skiing or those who ski very aggressively, the release characteristics may warrant consideration of TÜV-certified tech bindings or hybrid alternatives.
Stepping In Requires Skill
Getting into tech bindings takes practice, particularly in challenging conditions. You need to align the pins with the boot fittings and apply downward pressure to engage the mechanism. In deep snow, on uneven ground, or on steep slopes, this can prove frustrating for beginners.
Experienced users develop techniques that make entry second nature, but there's definitely a learning curve. Frame bindings, by contrast, work exactly like alpine bindings—you step in the same way you do at the resort, without any special technique required.
Some modern tech bindings feature wider toe platforms and guide systems that simplify entry, but it remains inherently more finicky than stepping into frame bindings.
Boot Compatibility Requirements
Tech bindings absolutely require boots with tech inserts—metal fittings at the toe and heel specifically designed to accept the binding pins. Standard alpine boots won't work with tech bindings, period.
This means committing to tech bindings often requires investing in new boots, adding several hundred dollars to your setup cost. While modern touring boots with tech inserts offer excellent performance, the requirement eliminates the option of using your existing alpine boots for occasional touring.
Additionally, not all tech inserts are created equal. Different manufacturers use slightly different insert designs, and some bindings work better with certain boot brands than others. Boot-binding compatibility testing becomes important, particularly for safety-critical release function.
Durability in Aggressive Use
Tech bindings are engineered for the uphill-focused, weight-conscious demands of backcountry skiing. They're not designed for the repeated impact, hard landings, and aggressive skiing that characterize resort use or extreme backcountry freeride skiing.
Skiers who use tech bindings for jumping, regular resort days, or extremely aggressive terrain report higher failure rates and more frequent premature releases. The small pins and lightweight construction simply weren't designed for these applications. Stories of broken pins, cracked toe pieces, and unexpected releases are common among skiers who push tech bindings beyond their intended use case.
This doesn't mean tech bindings are fragile—thousands of backcountry skiers use them reliably for years. But understanding the design limits helps set appropriate expectations and use patterns.
Modern Innovations in Tech Binding Design
The tech binding market has evolved dramatically since 2012 when Dynafit's patent expired. Competition and innovation have addressed many traditional limitations, creating options for virtually every style of backcountry skiing.
TÜV-Certified Tech Bindings
Models like the Dynafit ST Rotation series, Marker Kingpin, and Fritschi Tecton have achieved TÜV certification to alpine touring standards. These bindings incorporate rotating or laterally-releasing toe pieces, forward pressure systems, and more sophisticated release mechanisms that approximate alpine binding characteristics.
The result is more predictable release behavior and better safety margins, particularly for skiers who split time between resort and backcountry or who ski very aggressively. The tradeoff comes in added weight—typically 100-300 grams per binding compared to traditional tech bindings—and increased complexity.
Adjustable Toe Retention
The 2026 generation of tech bindings includes models with adjustable toe retention, eliminating the fixed high-retention toe that characterized earlier designs. Bindings like the ATK Raider EVO series allow you to tune toe release values to match your weight and skiing style, creating more balanced release characteristics across the full binding.
This innovation addresses one of the fundamental limitations of traditional tech bindings, though it adds mechanical complexity and weight.
Improved Heel Mechanisms
Modern tech binding heels feature sophisticated spring systems, elasticity, and dampening that improve downhill performance. Rolling-pin heel designs, spring-loaded mechanisms, and various forward-pressure systems all work to reduce premature release while maintaining appropriate safety margins.
These advancements narrow the performance gap between tech bindings and alpine bindings, though fundamental differences remain due to the pin connection system.
Automatic Brake Systems
Early tech bindings often lacked brakes entirely or used awkward manual brake systems. Current models feature automatic brakes that deploy when you release from the binding, just like alpine brakes. The ATK Raider EVO automatic brake system represents the state of the art, combining light weight with reliable function.
Brakes add roughly 50-100 grams per binding but provide crucial safety benefits, preventing runaway skis in fall scenarios where lost equipment could prove dangerous or result in long, difficult recoveries.
Comparing Tech Bindings to Alternatives
Understanding where tech bindings fit in the broader landscape of touring binding options helps clarify whether they're right for your needs.
Tech Bindings vs. Frame Bindings
Frame bindings represent the traditional alternative to tech bindings. They look and function like alpine bindings but sit on a frame that allows the heel to lift for touring.
Frame bindings excel in familiarity and downhill performance. They ski like alpine bindings, use standard DIN certification, and work with most boot types including standard alpine boots. For beginners or skiers who rarely tour, frame bindings offer a straightforward, reassuring option.
However, frame bindings are dramatically heavier (typically 1,500-3,000 grams per binding), create awkward touring motion with the pivot point forward of the toe, and feel clunky on ascents. For regular backcountry use, the weight and efficiency penalties become increasingly significant.
Most experienced backcountry skiers choose tech bindings over frame bindings unless they specifically need frame binding advantages like boot compatibility with alpine boots or maximum downhill security.
Tech Bindings vs. Hybrid Bindings
Hybrid bindings like the Salomon Shift2 and Marker Duke PT attempt to combine the uphill efficiency of tech bindings with the downhill performance of alpine bindings. They use tech toes for touring but convert to alpine-style binding interfaces for descents.
Hybrids offer the best downhill performance of any touring binding, with full DIN certification and alpine-like skiing characteristics. For skiers who split time 50/50 between resort and backcountry, or who prioritize aggressive downhill skiing above all else, hybrids make sense.
The compromises come in weight (900-1,100 grams per binding), complexity, cost (typically $600-800), and durability concerns from the complex mechanisms. For pure backcountry use where weight and uphill efficiency matter, traditional tech bindings usually provide a better overall experience.
Who Should Choose Tech/Pin Bindings
Tech bindings suit specific use cases and skiing styles particularly well. They're the default choice for:
Regular Backcountry Tourers: If you're touring multiple times per month and covering significant vertical, tech bindings provide the efficiency and comfort that make long days enjoyable.
Ski Mountaineering and Alpine Touring: For big objectives, multi-day trips, or tours exceeding 3,000-4,000 vertical feet, the weight savings become crucial. Tech bindings are essentially mandatory for serious ski mountaineering.
Weight-Conscious Skiers: Anyone prioritizing light, efficient setups naturally gravitates toward tech bindings. Ultralight enthusiasts can build complete touring setups weighing under 10 pounds per pair with appropriate tech bindings.
Experienced Backcountry Skiers: Once you've developed solid backcountry skills and understand your skiing style, tech bindings offer the performance and efficiency that experienced users appreciate.
Tech bindings may not be ideal for:
Beginners to Backcountry Skiing: The learning curve, both for using the bindings and understanding their limitations, can be steep. Frame bindings or TÜV-certified tech bindings might provide more confidence and margin for error.
Aggressive Resort Skiers Doing Occasional Tours: If you're primarily a resort skier who wants to tour occasionally without buying new boots, frame bindings make more sense.
Skiers Prioritizing Maximum Downhill Performance: If your backcountry goals emphasize steep, technical descents over efficient ascents, hybrid bindings provide better downhill confidence despite the weight penalty.
Making Your Decision
Choosing between tech bindings (and remember, pin bindings are the same thing) and alternatives comes down to prioritizing your specific needs and use cases.
Ask yourself these key questions:
How much will you tour? If you're planning regular backcountry outings, tech bindings' efficiency advantages quickly justify any learning curve or initial adjustment period.
What's your vertical ambition? Tours exceeding 2,000-3,000 vertical feet make tech binding weight savings increasingly valuable. Shorter tours make frame binding penalties more tolerable.
Do you own touring boots with tech inserts? If you already have compatible boots, tech bindings become the obvious choice. If you'd need to buy boots anyway, factor that cost into your decision.
How aggressive is your skiing style? Very aggressive skiers, those who jump, or skiers who expect to use their touring setup at resorts frequently should consider TÜV-certified tech bindings or hybrid alternatives rather than traditional tech bindings.
What's your budget? Traditional tech bindings range from $400-700, with TÜV-certified models at the higher end. Frame bindings start around $300-400 but require less boot investment. Hybrids typically cost $600-800 or more.
Conclusion: Embrace the Tech/Pin Revolution
The terminology confusion between pin bindings and tech bindings often obscures a more important truth: this binding technology has revolutionized backcountry skiing by making human-powered alpine skiing more efficient, enjoyable, and accessible than ever before.
Whether you call them pin bindings, tech bindings, or touring bindings, these lightweight, mechanically simple designs dominate the backcountry market for good reasons. They make long approaches feel manageable, reduce fatigue, and provide adequate performance for most backcountry skiing applications.
Modern innovations have addressed many traditional limitations, creating options for aggressive skiers, beginners, and everyone in between. TÜV-certified models offer enhanced safety, adjustable retention systems provide tuning options, and improved mechanisms deliver better downhill performance than ever before.
For most skiers committed to regular backcountry touring, tech/pin bindings represent the optimal choice. The learning curve proves worthwhile, the performance characteristics suit backcountry demands, and the efficiency gains make every tour more enjoyable.
Ready to find the perfect tech bindings for your backcountry setup? Explore our complete collection of alpine touring bindings featuring the latest tech binding innovations from industry-leading brands. Whether you're building your first touring setup or upgrading to lighter, more advanced bindings, we offer expert guidance to help you choose the right option for your skiing style and objectives.
Understanding DIN settings is crucial for backcountry safety, yet it's one of the most misunderstood aspects of alpine touring equipment. Whether you're mounting your first pair of touring bindings or upgrading from resort gear, getting your release settings dialed correctly can mean the difference between a safe day in the mountains and a season-ending injury. This comprehensive guide will walk you through everything you need to know about DIN settings for touring bindings, including the critical differences between tech bindings and frame bindings.
What Is a DIN Setting and Why Does It Matter?
DIN stands for Deutsches Institut für Normung, which translates to the German Institute for Standardization. In the skiing world, DIN refers to the standardized scale used to measure the release force of ski bindings. Simply put, your DIN setting determines how much force is required before your boot releases from the binding during a fall or impact.
The DIN scale typically ranges from 1 to 18 or higher, with lower numbers indicating easier release and higher numbers requiring more force. A binding set at DIN 3 will release with relatively little pressure, while one set at DIN 12 requires significantly more force to trigger a release.
Getting your DIN setting right is essential for two primary reasons. First, a setting that's too low can cause premature release, where your binding pops open unexpectedly during normal skiing. This can lead to dangerous falls, especially in steep or technical terrain where losing a ski could have serious consequences. Second, a setting that's too high prevents proper release during falls, potentially causing severe knee, ankle, or leg injuries when the binding should have released to protect you.
The Complex Reality of DIN Settings in Touring Bindings
Here's where things get complicated for backcountry skiers: not all touring bindings use true DIN settings. Understanding this distinction is crucial for making informed decisions about your equipment and safety.
Frame Bindings and Traditional DIN Certification
Frame bindings, which resemble traditional alpine bindings mounted on a frame or rail, are typically DIN-certified according to ISO standards. This means they've been independently tested and certified to release consistently and predictably at specific force levels. When a frame binding is set to DIN 8, it should release with the same force as any other DIN-certified alpine binding set to 8.
Frame bindings meet the ISO 9462 standard for alpine bindings, which establishes strict requirements for release testing, forward pressure, and boot compatibility. This certification provides a high level of confidence that your bindings will function as intended across various conditions and fall scenarios.
Tech Bindings and Release Values
Traditional tech bindings operate in a different realm. Most tech bindings are not DIN-certified because they don't meet the rigorous requirements of ISO 9462. Instead, they use what's commonly referred to as "release values" or "RV numbers" that approximate DIN settings but aren't held to the same standards.
In a typical tech binding configuration, the toe piece has a fixed release value, usually equivalent to approximately DIN 10-12. This toe release cannot be adjusted on many models. The heel piece, meanwhile, offers adjustable vertical and horizontal release values that can be set to different numbers, but these numbers don't necessarily correlate directly to DIN standards.
This means that a tech binding set to "8" may not release with the same force as a DIN-certified binding set to 8. The actual release characteristics can vary between manufacturers and even between different models from the same brand.
TÜV-Certified Tech Bindings
Adding another layer to this discussion, some newer tech bindings have achieved TÜV certification to the ISO 13992:2007 standard, which is specifically designed for alpine touring bindings. TÜV is an independent European testing organization that certifies consumer products meet specific safety and performance standards.
Bindings like the Dynafit ST Rotation series, and Salomon/Atomic Shift2 MN Bindings have achieved this certification, meaning they've been tested to ensure consistent release characteristics similar to alpine bindings. TÜV-certified tech bindings represent a middle ground, offering better release predictability than traditional tech bindings while maintaining the weight savings and efficiency advantages.
However, it's important to note that even TÜV certification comes with caveats. The certification is often specific to certain boot models or tech fittings, and real-world performance can still vary based on factors like snow conditions, boot fit, and how well the bindings are maintained.
Factors That Determine Your Ideal DIN Setting
Several variables influence what DIN or release value setting is appropriate for your touring setup. Professional ski technicians use standardized charts that incorporate these factors to calculate your recommended settings.
Weight and Height
Your body weight and height are primary factors in determining release settings. Heavier and taller skiers generate more force during falls and aggressive skiing, requiring higher settings to prevent premature release. Lighter and shorter skiers need lower settings to ensure the binding can release when necessary to protect joints and ligaments.
The relationship isn't linear, though. A 200-pound skier doesn't simply need double the DIN of a 100-pound skier. The standardized charts account for the complex biomechanics of how forces are transmitted through the body during falls.
Age
Age plays a surprising role in DIN calculations. Skiers over 50 typically receive a setting one step lower than younger skiers with the same physical characteristics. This adjustment reflects the fact that older skiers generally have less bone density and slower recovery from injuries, making conservative release settings more appropriate.
Boot Sole Length
Your boot sole length, measured in millimeters and marked on the boot itself, factors into the release force calculation. Longer boot soles create longer lever arms, affecting how force is transmitted to the binding. This is why you'll always need to provide your exact boot sole length when having bindings mounted or adjusted.
Skiing Ability and Style
One of the most subjective but critical factors is your skier type classification, typically broken down into three categories:
Type 1 (Cautious): You're a beginner or prefer moderate terrain, lower speeds, and careful skiing. You prioritize safety over performance and want bindings that release relatively easily.
Type 2 (Moderate): You're a competent recreational skier in good physical condition who enjoys varied terrain at average speeds. This describes most backcountry skiers who tour regularly but don't ski extremely aggressively.
Type 3 (Aggressive): You're an expert skier who charges hard, skis steep technical terrain, takes air, and pushes equipment to its limits. You need higher release settings to prevent unwanted release during aggressive skiing.
Most backcountry skiers honestly fit into Type 2. It's tempting to overestimate your ability level, but being realistic about your skiing style is crucial for safety.
Special Considerations for Touring Bindings
Setting touring bindings involves additional considerations beyond what you'd encounter with resort bindings, primarily due to the different types of terrain and conditions you'll encounter in the backcountry.
The Premature Release Problem
Premature release, where your binding unexpectedly opens during normal skiing, is more common with tech bindings than with DIN-certified alpine bindings. This happens because tech bindings lack the elasticity and damping that alpine bindings provide. When you hit a bump or land from a small drop, the impact force travels directly through the pin connection without the cushioning effect of alpine binding mechanisms.
For this reason, many experienced touring skiers run their tech bindings slightly higher than they would set an alpine binding. However, this approach requires careful consideration and shouldn't be done casually. Running settings too high to prevent premature release defeats the safety purpose of release mechanisms entirely.
Terrain-Specific Adjustments
Some backcountry skiers adjust their settings based on the terrain they're skiing. For long tours on moderate terrain, standard settings work well. For steep, technical descents where a premature release could be catastrophic, some skiers bump their settings up slightly or even lock out the heel piece entirely if the binding offers that option.
This practice is controversial and should only be employed by very experienced skiers in specific scenarios. Locking out your bindings or running them significantly higher than recommended greatly increases injury risk if you fall.
Environmental Factors
Cold temperatures, ice buildup, and snow accumulation can all affect how touring bindings release. Ice forming between the boot and binding can prevent proper release or cause unexpected opening. Regular maintenance and keeping your bindings clear of debris becomes even more critical in backcountry settings where conditions are more variable.
How to Calculate Your DIN Setting
While numerous online DIN calculators exist, it's crucial to understand that these tools provide approximations, not definitive answers. The most reliable approach is visiting a certified ski technician who can use standardized charts and professional judgment to determine your appropriate settings.
That said, understanding the calculation process helps you verify technician recommendations and make informed decisions about your equipment. The ISO 11088 standard provides the framework most professionals use.
The Standard Calculation Process
Professional technicians typically follow these steps:
First, they classify you as Skier Type 1, 2, or 3 based on your skiing style and preferences. This classification acts as the foundation for all subsequent calculations.
Next, they locate your weight and height intersection on a standardized chart, which provides a "skier code" letter (typically A through L or similar).
They then cross-reference this skier code with your boot sole length in millimeters. Different boot sole lengths require different release forces to achieve consistent release characteristics.
Finally, they apply age corrections if you're over 50, typically reducing the setting by one step.
Online Calculators and Their Limitations
Many websites offer DIN calculators that ask for your weight, height, age, boot sole length, and skier type. These can provide useful ballpark figures when choosing bindings or verifying professional settings, but they have significant limitations.
First, these calculators cannot account for individual variations in flexibility, conditioning, injury history, or other personal factors that a skilled technician considers. Second, they assume you'll answer honestly about your ability level, which many skiers struggle to do objectively. Third, they can't verify that your boots and bindings are properly compatible or that the mounting and adjustment have been done correctly.
Use calculators as educational tools and rough guides, but never as replacements for professional binding mounting and adjustment.
Setting Up Different Types of Touring Bindings
The adjustment process varies significantly depending on what type of touring binding you're using. Understanding these differences helps you work effectively with technicians and maintain your equipment properly.
Frame Binding Adjustment
Frame bindings adjust much like traditional alpine bindings, with screws on both the toe and heel pieces that control release values. The main difference is that you need to account for the additional weight and potential ice buildup that can occur during touring.
Most technicians recommend starting with standard DIN settings for frame bindings, then potentially adjusting based on experience. Because frame bindings are DIN-certified and function like alpine bindings, the standard calculation methods apply directly.
Traditional Tech Binding Setup
Traditional tech bindings without TÜV certification typically require separate adjustments for vertical and horizontal release at the heel. Many models offer no toe adjustment at all, as the toe piece has a fixed retention value.
Setting tech bindings is more art than science. You'll work with your boot sole length to set proper forward pressure and heel gap, then adjust the heel release values. Because these aren't true DIN numbers, technicians often rely on manufacturer guidelines and personal experience with specific binding models.
The fixed toe retention on traditional tech bindings means they're less suitable for very light skiers or beginners who need lower overall release forces. Conversely, the high toe retention can benefit aggressive skiers, though it also means less predictable release in certain fall scenarios.
TÜV-Certified Tech Bindings
TÜV-certified tech bindings like the Dynafit Rotation series or Atomic/Salomon Shift2 MN offer adjustable release at both toe and heel, providing more consistent release characteristics across different force directions. These bindings can be set using standard DIN calculation methods, though you should still follow manufacturer-specific guidelines.
The rotating or moving toe pieces on these bindings provide some elasticity, which helps reduce premature release while maintaining proper safety margins. This makes them more forgiving and versatile than traditional tech bindings.
Hybrid Bindings
Hybrid bindings like the Tyrolia Attack Hybrid function as full alpine bindings in ski mode, using standard DIN adjustment procedures. These bindings meet alpine certification standards when locked down for descents, providing the most predictable and consistent release characteristics of any touring binding.
However, the increased mechanism complexity and weight of hybrid bindings means they require more careful maintenance to ensure proper function. Ice buildup in the toe mechanism can prevent proper mode transitions or affect release characteristics.
Professional Mounting and Adjustment: Why It Matters
Despite the wealth of information available online, professional binding mounting and adjustment remains essential for several critical reasons.
Liability and Warranty
Most binding manufacturers void warranties if bindings aren't mounted by certified technicians using proper equipment. If your bindings fail and cause injury, having professional mounting documentation provides important legal protection and may be required for any insurance claims.
Specialized Equipment
Professional shops use specialized equipment to test release function in multiple directions, verify forward pressure, and ensure proper anti-friction device height. These tests can't be replicated with simple hand tools, and they provide critical verification that everything is functioning as designed.
Experience and Judgment
Certified technicians have mounted thousands of bindings and understand the nuances of different boot and binding combinations. They can spot potential compatibility issues, recognize when boot sole wear requires different mounting positions, and apply judgment about appropriate settings for your specific situation.
Proper Testing and Documentation
Shops provide documentation of your settings, boot sole length, and skier type classification. This record becomes valuable when you need remounting, are traveling and need emergency service, or are setting up additional pairs of skis with different bindings.
When to Adjust Your DIN Settings
Your DIN settings aren't a set-it-and-forget-it aspect of your setup. Several scenarios warrant adjustment or at minimum verification that current settings remain appropriate.
Start of Each Season
Bindings should be inspected and tested at the start of each season. Springs can settle over time, mechanisms can develop play, and your physical condition may have changed. Most shops offer free binding tests with basic tune-ups.
Significant Weight Changes
If you gain or lose more than 10 pounds, your DIN settings should be recalculated. Weight changes alter the forces generated during falls and affect appropriate release values.
After Injury or Surgery
Following any significant injury, especially to knees, ankles, or legs, consult with medical professionals and technicians about whether your settings should be adjusted. Recovery from certain injuries may warrant more conservative settings.
Changing Boot Sole Length
If you replace your boots or have them resoled, the new boot sole length may differ from your previous setup. Even small differences can affect release characteristics and may require remounting or adjustment.
Persistent Premature Release
If you're experiencing consistent premature release during normal skiing, something needs attention. This might indicate settings that are too low, but it could also signal mechanical problems with the bindings, compatibility issues with your boots, or improper mounting. Don't simply crank up your DIN without investigating the root cause.
Common Mistakes and Misconceptions
Understanding what not to do is often as important as knowing proper procedures. Several common mistakes can compromise your safety or lead to equipment damage.
Setting DIN Based on Weight Alone
The "10 pounds equals 1 DIN" rule you might hear is dangerously oversimplified. DIN calculations involve weight, height, boot sole length, age, and skiing ability. Using weight alone ignores critical factors and can result in unsafe settings.
Assuming Higher Is Safer
Some skiers incorrectly believe that higher DIN settings are inherently safer because they "hold you in better." In reality, bindings that don't release when they should cause far more serious injuries than premature releases. Trust the calculated settings rather than arbitrarily cranking numbers higher.
Ignoring Manufacturer Guidelines
Every binding model has specific requirements and characteristics. Following generic advice without consulting manufacturer documentation can lead to improper setup. This is especially true with touring bindings, where differences between models are more pronounced than in alpine bindings.
Adjusting Settings on the Mountain
Making major DIN adjustments in the field without proper tools or testing equipment is extremely dangerous. If you're experiencing issues during a tour, it's better to ski conservatively and address the problem properly later than to make blind adjustments.
Maintenance and Long-Term Care
Proper maintenance ensures your bindings continue to function correctly at their set release values over time.
Regular Cleaning
Keep your bindings clear of dirt, ice, and debris. Clean them after every backcountry tour, paying special attention to the toe pins and heel mechanisms on tech bindings. A soft brush and occasional application of appropriate lubricants keeps mechanisms working smoothly.
Annual Professional Inspection
Even if your bindings seem fine, annual professional testing verifies they're still releasing at appropriate forces. Springs weaken over time, mechanisms develop wear, and small issues can compromise safety long before they're obvious to casual inspection.
Storage Considerations
Store skis with bindings in a dry location away from extreme temperatures. Don't leave them in hot cars during summer or in freezing garages all winter. Temperature extremes can affect spring tension and plastic components.
Making Informed Decisions About Your Setup
Armed with this understanding of DIN settings and touring bindings, you're better equipped to make informed decisions about your backcountry setup. Remember these key principles:
Always have your bindings mounted, adjusted, and tested by certified technicians. The small cost is insignificant compared to the safety benefits and peace of mind.
Be honest about your skiing ability when determining your skier type. Overestimating your skills can lead to dangerously high settings.
Understand that touring bindings, especially traditional tech bindings, don't offer the same release predictability as DIN-certified alpine bindings. This doesn't make them unsafe, but it does require more careful consideration and potentially more conservative skiing in certain situations.
When in doubt, err on the side of caution. A premature release is annoying and potentially dangerous in exposed terrain, but it's far less likely to cause serious injury than bindings that don't release during a hard fall.
Choosing the Right Bindings for Your Needs
Your DIN requirements should influence which touring bindings you choose. If you're a lighter skier who needs lower release settings, traditional tech bindings with their fixed high toe retention may not be ideal. Consider TÜV-certified tech bindings or frame bindings that offer proper release across a wider range of settings.
If you're a heavier or more aggressive skier, you have more options. Traditional tech bindings can work well, though you may prefer the added security and predictability of hybrid bindings for particularly steep or technical terrain.
Ready to find the perfect touring bindings for your backcountry adventures? Explore our complete collection of alpine touring bindings to discover options that match your skiing style, weight range, and performance requirements. From lightweight tech bindings to robust hybrid systems, we offer expert guidance to help you make the right choice.
Final Thoughts: Safety First, Always
DIN settings represent one of the most important safety considerations in skiing, yet they're often misunderstood or treated casually. Taking the time to understand how release settings work, why they matter, and how touring bindings differ from alpine bindings makes you a more informed and safer backcountry skier.
Never view your DIN setting as a status symbol or competition metric. The "right" number is whatever keeps you skiing safely for the long term, not what seems impressive or matches what your friends run. Skiing is fundamentally about managing risk, and proper binding setup is one of the most straightforward and effective risk management tools available.
The backcountry offers incredible experiences and challenges, but it also demands respect and careful preparation. Getting your binding setup right, including appropriate DIN or release value settings, is a fundamental part of that preparation. Ski smart, ski safe, and enjoy the mountains.
When you're ready to venture beyond the resort and earn your turns in the backcountry, choosing the right alpine touring bindings becomes one of the most critical decisions in your setup. With the backcountry skiing market experiencing explosive growth in 2026—partly driven by ski mountaineering's inclusion in the Winter Olympics—manufacturers have flooded the market with more options than ever before. Understanding the fundamental differences between tech bindings and frame bindings is essential to finding the right match for your skiing style and objectives.
What Are Alpine Touring Bindings?
Alpine touring bindings, often referred to as AT bindings or randonnée bindings, serve a dual purpose that sets them apart from traditional alpine bindings. These specialized bindings allow you to release your heel while keeping your toe connected to the ski, enabling a natural walking motion when skinning uphill. When you reach your destination and it's time to descend, you can lock your heel back into the binding and ski downhill with control and confidence.
The key innovation lies in their versatility: you can efficiently ascend thousands of vertical feet and then enjoy the descent without switching gear. This functionality has revolutionized backcountry skiing, making it more accessible and enjoyable for skiers of all levels.
Understanding Tech Bindings: Lightweight Efficiency
Tech bindings, originally developed by Dynafit in the 1980s, represent the most popular category of alpine touring bindings in 2026. After Dynafit's patent expired in the early 2000s, the market exploded with innovation, and today's tech bindings offer remarkable performance at impressively low weights.
How Tech Bindings Work
Rather than using the traditional "fins" found on alpine bindings, tech bindings employ a pin system. Two metal pins at the toe piece connect directly to steel inserts built into your touring boots. This design places the pivot point near your foot's natural rotation point, creating a smooth, ergonomic climbing motion that feels remarkably natural.
During ascent, your boot stays connected only at the toe, allowing your heel to rise freely with each step. You're only lifting the weight of your boot rather than the entire binding, which dramatically reduces the energy required for uphill travel. When you're ready to descend, you step into the heel piece, which uses additional pins (or in some cases, a more traditional mechanism) to lock your boot securely to the ski.
Advantages of Tech Bindings
The primary appeal of tech bindings is their exceptional weight savings. Modern tech bindings can weigh as little as 300-450 grams per binding, with ultralight race models dropping below 200 grams. This weight reduction translates directly to improved uphill efficiency—over the course of a long tour, you'll expend significantly less energy compared to heavier alternatives.
The natural walking motion enabled by tech bindings makes ascending steep terrain and sidehilling far more comfortable. Because you're pivoting at a point close to the ball of your foot, the movement mimics your normal stride, reducing fatigue even on extended tours.
Another significant advantage is the streamlined transition from tour mode to ski mode. Many tech bindings allow you to switch modes without removing your skis, saving valuable time and reducing the risk of dropping gear on steep or exposed terrain.
Boot Compatibility Requirements
Tech bindings require boots specifically designed with tech fittings—metal inserts at both the toe and heel of the boot. Any boot labeled as "alpine touring" will have these fittings and work with tech bindings. However, you cannot use standard alpine ski boots with tech bindings, which means you'll need to invest in dedicated touring boots.
Most tech bindings are compatible with ISO 9523 touring boot soles, though some also work with non-compliant lightweight mountaineering boot soles. It's crucial to verify compatibility between your chosen boots and bindings before making a purchase.
Categories of Tech Bindings
Tech bindings in 2026 span a wide performance spectrum. At the lightweight end, you'll find ultralight bindings designed for ski mountaineering and long tours where every gram counts. These models prioritize uphill efficiency and may sacrifice some downhill performance.
Mid-range tech bindings offer a balance between weight savings and downhill capability, making them suitable for general backcountry touring and day trips. These bindings often include features like adjustable release values, heel risers for steep climbs, and integrated brakes.
For aggressive freeriders, burlier tech bindings incorporate additional materials and mechanisms to improve power transfer and responsiveness on the descent. Models like the ATK Raider 13 EVO and various offerings from Dynafit provide robust downhill performance while maintaining reasonable weights for uphill travel.
ATK Raider 13 EVO Ski Binding
Frame Bindings: Downhill Performance with Touring Capability
Frame bindings represent the more traditional approach to alpine touring, essentially adapting alpine binding technology for backcountry use. These bindings consist of a toe piece and heel piece connected by a frame or rail that runs the length of the binding.
How Frame Bindings Work
Frame bindings function similarly to standard alpine bindings when locked down for skiing. The entire binding assembly—toe piece, heel piece, and connecting frame—sits on a platform that can pivot at the toe. When you want to tour uphill, you unlock a mechanism that allows the entire frame to lift with each step, while the toe remains anchored to the ski.
This design means the binding stays attached to your boot during uphill travel. Your boot, binding, and ski move together as a unit, with the pivot point located in front of your toes rather than at the natural ball of your foot.
Advantages of Frame Bindings
The primary strength of frame bindings is their downhill performance. Because they're essentially full alpine bindings, they provide excellent power transfer, stability, and control when skiing. The wider platform and robust construction inspire confidence, particularly for skiers who spend significant time at resorts and want the same binding feel in the backcountry.
Frame bindings are officially DIN-certified, meaning they meet international safety standards for predictable release in the event of a fall. For many skiers, particularly those new to backcountry skiing, this certification provides peace of mind that tech bindings typically don't offer.
Another major advantage is boot compatibility. Frame bindings work with most boot types, including standard alpine boots, touring boots with tech fittings, and hybrid boots with GripWalk or Walk to Ride soles. This versatility makes frame bindings an excellent choice if you want to use your existing alpine boots for occasional backcountry adventures without purchasing dedicated touring boots.
Frame bindings are also generally more affordable than tech bindings, with prices often hundreds of dollars less than comparable tech or hybrid models. For someone testing the waters of backcountry skiing, frame bindings offer a cost-effective entry point.
Disadvantages of Frame Bindings
Weight is the most significant drawback of frame bindings. These bindings typically weigh between 1,600 and 3,000 grams per binding—substantially more than tech bindings. Over the course of a long tour, this additional weight can lead to increased fatigue and reduced efficiency.
The placement of the pivot point in frame bindings creates a less natural walking motion. Because the pivot is forward of your toes rather than at the ball of your foot, the stride feels more awkward, particularly on steep terrain and when traversing. The entire binding lifts with each step, adding resistance that becomes increasingly noticeable on long ascents.
Additionally, the rigid frame connection reduces the ski's natural flex, which can make the uphill portion feel more strenuous and less fluid compared to the freedom of movement provided by tech bindings.
The Rise of Hybrid Bindings in 2026
The evolution of alpine touring bindings has led to a third category that's gained tremendous popularity: hybrid bindings. These innovative designs attempt to combine the best aspects of both tech and frame bindings, offering lightweight uphill performance with robust downhill capability.
Understanding Hybrid Technology
Hybrid bindings like the Salomon Shift2 and ATK HY use tech toepieces for uphill travel, allowing for efficient touring with a natural stride. However, they transition to a more traditional alpine-style binding interface for the descent, providing superior power transfer and release characteristics compared to pure tech bindings.
The Shift2, for example, features a tech toe that you step into for touring mode. When you're ready to ski, you flip a lever that closes wings over the toepiece, converting it to a fully certified alpine toe interface. The heel piece functions as a traditional alpine heel, complete with DIN certification and predictable release.
Who Should Consider Hybrid Bindings
Hybrid bindings have become the gold standard for skiers who split their time relatively evenly between resort skiing and backcountry adventures. They're also popular among freeride-oriented backcountry skiers who prioritize aggressive downhill skiing and want maximum confidence on steep, technical terrain.
These bindings excel as "one-ski quiver" setups, allowing you to use the same skis for everything from resort powder days to multi-hour backcountry missions. While they're heavier than pure tech bindings (typically 900-1,000 grams per binding for the Shift2), they're still significantly lighter than frame bindings.
The trade-off is complexity and cost. Hybrid bindings are among the most expensive options on the market, and their mechanisms require more care and maintenance than simpler tech or frame designs. Users need to be mindful of snow and ice buildup, and the transition process is more involved than with traditional tech bindings.
Key Considerations When Choosing Between Tech and Frame Bindings
Uphill vs. Downhill Priority
The fundamental question to ask yourself is: what percentage of your time will you spend going uphill versus downhill, and which aspect do you value more?
If you're planning long tours where you'll spend three hours climbing for thirty minutes of descending, tech bindings make the most sense. The weight savings and natural touring motion will make those long approaches far more enjoyable. Conversely, if you're primarily interested in accessing steep, technical terrain for aggressive skiing and don't mind working harder on the ascent, frame bindings or hybrid options provide superior downhill performance.
Your Existing Gear
Consider your current boot situation. If you already own quality alpine boots and want to start touring without a significant additional investment, frame bindings allow you to use what you have. However, if you're building a setup from scratch or are committed to regular backcountry skiing, investing in touring boots and tech bindings will provide a better long-term experience.
Skiing Style and Terrain
Aggressive skiers who hit jumps, charge steep lines, and ski fast in variable conditions often prefer the security and power of frame bindings or high-end hybrid models. The more predictable release and robust construction provide confidence when skiing at the limit.
Skiers focused on covering distance, accessing remote peaks, or ski mountaineering will benefit most from lightweight tech bindings. The weight savings become increasingly significant on tours exceeding 2,000-3,000 vertical feet.
Budget Considerations
Frame bindings represent the most affordable entry point, often available for $300-400. Tech bindings range from around $400 for basic models to $700+ for premium options with advanced features. Hybrid bindings command premium prices, typically $600-800 or more.
Remember that your binding choice affects your entire system. Tech bindings require dedicated touring boots (another $400-800), while frame bindings may work with boots you already own.
Safety and Release Considerations
Understanding binding release mechanisms is crucial for safety in the backcountry. Frame bindings are DIN-certified, meaning they meet international standards for release force and testing. When properly adjusted by a certified technician, they'll release predictably in a fall.
Traditional tech bindings generally lack DIN certification. While they do have release mechanisms, the release characteristics differ from alpine bindings. The toe pieces typically have a fixed release value (approximately equivalent to a DIN of 10-12), while the heel piece offers some adjustability. This can make achieving proper release settings more challenging, particularly for lighter skiers or those at the extremes of the weight spectrum.
Some newer tech bindings have achieved TÜV certification, an independent European standard for touring binding safety. Bindings like the Fritschi Tecton and various Marker models meet these standards, providing release characteristics more similar to alpine bindings while maintaining tech binding efficiency.
Regardless of binding type, it's essential to have your bindings mounted and adjusted by a certified ski technician who understands the specific requirements of touring bindings.
The 2026 Market Landscape
The alpine touring binding market in 2026 is more competitive and innovative than ever. Here are some trends shaping current offerings:
Weight Optimization: Manufacturers continue pushing the boundaries of lightweight design. The ATK Raider 13 EVO, for instance, weighs just 370 grams while incorporating adjustable toe release values—a feature previously unavailable in pin bindings.
Improved Brakes: Automatic brake retention systems have addressed one of tech bindings' historical weaknesses. Models like the ATK Raider EVO feature brakes that engage reliably without adding significant weight.
Enhanced Entry: Getting into tech bindings in challenging conditions has traditionally been frustrating. New designs feature wider step-in platforms and intuitive mechanisms that make entry easier, even with built-up snow.
Durability Focus: Brands are using more metal components and reinforced construction in freeride-oriented models, addressing concerns about plastic parts breaking under aggressive use.
Hybrid Evolution: Second-generation hybrid bindings like the Shift2 have refined the original designs, improving durability, power transfer, and brake reliability based on years of real-world feedback.
Making Your Decision
Choosing between tech and frame bindings ultimately depends on your specific needs, goals, and skiing style. Here's a simplified decision framework:
Choose Tech Bindings If:
Weight savings and uphill efficiency are priorities
You're planning long tours or multi-day trips
You're willing to invest in dedicated touring boots
You're comfortable with the different release characteristics
You want the most natural touring motion
Choose Frame Bindings If:
You're new to backcountry skiing and want familiar downhill performance
You want to use your existing alpine boots
You prioritize downhill skiing over uphill efficiency
You value DIN certification and predictable release
Budget is a primary concern
Your tours are relatively short (under 1,500 vertical feet)
Choose Hybrid Bindings If:
You split time evenly between resort and backcountry
You want one setup that can do everything
Downhill performance is crucial but weight matters
You're willing to invest in premium equipment
You ski aggressively in the backcountry
Beyond Bindings: Building Your Complete Setup
Remember that bindings are just one component of your backcountry system. Your choice should integrate with your overall setup goals:
Match your binding weight to your ski weight. Ultralight bindings pair best with lightweight touring skis, while burlier bindings complement more substantial freeride-oriented skis. Mismatching can lead to an unbalanced setup that doesn't perform optimally.
Ensure boot compatibility not just in terms of tech fittings, but also in terms of flex and stiffness. A stiff, powerful boot paired with a minimalist tech binding won't allow you to fully utilize the boot's capabilities.
Consider your complete touring kit, including skins, poles, safety gear, and clothing. The weight you save on bindings might be offset if you're carrying unnecessary items in your pack.
Conclusion: The Right Binding for Your Adventures
The debate between tech and frame bindings doesn't have a universal winner—only the right answer for your individual situation. Frame bindings continue to serve beginners and resort-focused skiers well, providing familiar performance and affordability. Tech bindings dominate the market for dedicated backcountry skiers, offering unmatched efficiency for those logging serious vertical feet. And hybrid bindings have carved out a strong niche for skiers who refuse to compromise on either uphill or downhill performance.
As you consider your options, reflect honestly on how you'll actually use your setup. Many skiers overestimate how much resort skiing they'll do with their touring setup or underestimate how much the weight penalty of frame bindings will affect their experience on long tours.
The good news is that the alpine touring binding market in 2026 offers exceptional options across all categories. Whether you're taking your first steps into the backcountry or looking to upgrade your existing setup, there's a binding designed for exactly how you want to ski.
Ready to find the perfect alpine touring bindings for your backcountry adventures? Explore our complete selection of tech, and hybrid bindings and discover the setup that will unlock your next mountain objective.
If you’ve ever spent a day on the slopes with aching feet or numb toes, you know how crucial ski boot comfort is. While shell fit and flex get plenty of attention, the ski boot liner inside your boot is just as important—if not more so—for comfort, warmth, and performance. But with so many liner options on the market, choosing the right one can be overwhelming. In this comprehensive guide, we’ll break down the main types of ski boot liners, their unique benefits, and how to select the best liner for your skiing style and anatomy.
What Is a Ski Boot Liner?
A ski boot liner is the removable, cushioned inner boot that sits inside the hard plastic shell of your ski boot. It provides insulation, padding, and a customized fit. The liner is what actually touches your foot, so it plays a huge role in comfort, warmth, and how well your boot transmits movements to your skis.
Why Ski Boot Liners Matter
Comfort: Liners cushion your foot, reduce pressure points, and prevent blisters.
Warmth: The insulation in liners keeps your feet warm in freezing conditions.
Performance: A snug liner improves power transfer from your legs to your skis, giving you better control.
Fit Customization: Liners can be molded or adjusted to match your foot shape, addressing fit issues that shells alone can’t solve.
Choosing the right liner can transform your skiing experience, making long days on the mountain more enjoyable and helping you ski at your best.
Main Types of Ski Boot Liners
There are three primary categories of ski boot liners:
Stock Liners
Thermoformable (Heat-Moldable) Liners
Custom Liners
1. Stock Liners
Stock liners are the standard liners that come pre-installed in most ski boots. Made from foam and fabric, they’re designed to fit a wide range of foot shapes and sizes. While they offer basic comfort and insulation, they typically pack out (compress and lose shape) after a season or two of use.
Pros: Included with boots, affordable, decent out-of-the-box comfort.
Cons: Generic fit, less durable, pack out quickly, limited customization.
Best for: Beginners, casual skiers, or those on a budget who don’t ski frequently.
2. Thermoformable (Heat-Moldable) Liners
Thermoformable liners are made with special foams that can be heated and molded to the unique shape of your foot and the inside of your ski boot shell. Many mid- to high-end ski boots now come with heat-moldable liners, and aftermarket options are available.
Pros: Custom fit, better comfort, improved performance, can be re-molded.
Cons: More expensive than stock liners, require professional fitting for best results, still may pack out over time.
Best for: Intermediate to advanced skiers, those with hard-to-fit feet, or anyone seeking a more tailored fit.
3. Custom Liners
Custom liners (such as those from Intuition or ZipFit) are the gold standard for fit and performance. These liners are built from high-quality, dense foams or proprietary materials that can be fully customized to your foot and shell. Customization may involve heat molding, injecting foam, or using cork or other materials to fill gaps and create a truly personalized fit.
Pros: Ultimate fit and comfort, excellent warmth, superior performance, longer lifespan.
Cons: Highest cost, require professional fitting, may feel firmer initially.
Best for: Expert skiers, racers, backcountry enthusiasts, or anyone with challenging foot shapes or chronic fit issues.
Specialty Liners: Touring, Alpine, and Freeride
Within these main categories, you’ll also find liners designed for specific skiing disciplines:
Alpine Liners: Prioritize downhill control and warmth. Usually thicker and stiffer for maximum power transfer.
Touring Liners: Lighter and more flexible, designed for comfort and mobility during uphill travel. Often feature thinner profiles and more breathable materials.
Freeride Liners: Strike a balance between support and comfort, suitable for aggressive skiing and variable terrain.
Key Benefits of Upgrading Your Ski Boot Liners
Why consider upgrading your liners, even if your boots are relatively new?
Improved Fit: Custom or heat-moldable liners can eliminate pressure points and improve overall fit.
Enhanced Warmth: Higher-quality liners use better insulating materials, keeping your feet warmer on cold days.
Better Performance: A snug, supportive liner increases responsiveness and control, especially at higher speeds or in challenging conditions.
Extended Boot Life: Replacing packed-out liners can breathe new life into older shells, saving you money on new boots.
Personalization: Address unique foot shapes, volume issues, or specific comfort needs.
How to Choose the Right Ski Boot Liner
With so many options, how do you pick the best liner for your needs? Consider these factors:
1. Skiing Style and Discipline
Resort Skiers: Look for warmth, comfort, and support.
Backcountry/Touring: Prioritize lightweight, breathable liners with good mobility.
Racers/Experts: Seek out performance-oriented, firmer liners for maximum control.
2. Foot Shape and Volume
If you have high arches, wide feet, or other unique foot characteristics, a thermoformable or custom liner can resolve fit issues that off-the-shelf liners can’t.
3. Boot Shell Compatibility
Not all liners fit all shells. Check with your boot manufacturer or a professional boot fitter to ensure compatibility, especially if you’re considering aftermarket or custom liners.
4. Budget
Stock liners are the most affordable, while custom options can be a significant investment. However, the comfort and performance gains often justify the cost for frequent skiers.
5. Professional Fitting
For the best results, especially with heat-moldable or custom liners, visit a reputable boot fitter. They can help you select the right liner, mold it to your foot, and make further adjustments as needed.
Signs You Need New Ski Boot Liners
Your boots feel loose or sloppy, even when fully buckled.
You notice cold spots or reduced warmth.
The liner foam feels compressed or packed out.
You develop new pressure points or discomfort.
There’s visible wear, holes, or odors that don’t go away.
If you’re experiencing any of these issues, it may be time to upgrade your liners rather than replacing your entire boot.
Care and Maintenance Tips for Ski Boot Liners
Dry Liners After Each Use: Remove liners from shells and let them air dry to prevent odor and mold.
Use Boot Dryers: Electric boot dryers speed up the drying process and extend liner life.
Wash Liners Occasionally: Hand wash with mild soap and air dry fully before reinserting.
Avoid Excessive Heat: Don’t place liners on radiators or in direct sunlight, as this can damage the foam.
Frequently Asked Questions About Ski Boot Liners
Can I replace my ski boot liners without buying new boots?
Yes! Upgrading your liners is a cost-effective way to improve fit and comfort, especially if your shells are still in good condition.
How long do ski boot liners last?
Stock liners may last 50-100 ski days before packing out, while high-quality custom liners can last 150+ days with proper care.
Are custom liners worth the investment?
For frequent skiers, those with challenging foot shapes, or anyone seeking the best possible fit and performance, custom liners are often worth every penny.
Conclusion: The Right Liner Makes All the Difference
Don’t overlook your ski boot liners when seeking comfort and performance on the slopes. Whether you’re a beginner or a seasoned pro, choosing the right liner type can transform your skiing experience. Consider your skiing style, foot shape, and budget, and don’t hesitate to consult a professional boot fitter for personalized advice.
Ready to dive deeper into ski boot selection? Check out our comprehensive guide on choosing the right ski boots for more tips on finding your perfect fit.
Happy skiing—and here’s to warm, comfortable feet all winter long!
Super friendly and extremely knowledgeable staff. Lots of great products. I was impressed that the staff can speak intelligently about hiking/walking spikes for your shoes and then provide excellent direction about the latest telemark gear! Nothing is to "lame" or too niche. It's our go to outdoor gear store in Canmore.
Chris Payne
Real customer
★★★★★
Well stocked shop with knowledgable staff. Spent some time trying on some boots, got some helpful insights from a staff member. Even walked away with some advice on ice routes in the area to take the boots for a spin. Thanks.
Eric Gavaletz
Real customer
★★★★★
Absolutely amazing service! Just purchased some boots. I’ve had major pain with my PF and the gentleman who helped us was so knowledgeable and made sure we left with the correct boot. 10/10 service, not comparable to Ontario. So much better! Would recommend to come here!
Jacob Dusza
Real customer
★★★★★
Bought from here instead of a shop in Calgary and I’m so glad I did! The staff are amazing and you can tell thy they really enjoy helping people who come in. The man who helped me today was top notch, he took his time helping me find the best possible climbing harness and helmet. I will definitely be saving all my shopping for this sweet climbing shop in Canmore! They are my new favourites. Thank you!!!
Kimberly McNeill
Real customer
★★★★★
Staff are knowledgeable with the gear that I've bought there and are experienced in all outdoor activities. They offer great advice in whatever outdoor activities you enjoy. It's my go to place for gear. So far, I've been happy with my purchases there. I love in Calgary and I don't mind the drive to Canmore knowing that I will always get great service.
Dennis Espiritu
Real customer
★★★★★
Staff went above and beyond to ensure I had shoes that fit. Even worked with me over the phone, and a time zone away when my initial purchase didn't fit right. Very impressed with staff and owners. 100% would recommend.
Jennifer Lowe
Frequently asked questions
Got questions? Find answers about sizing, gear care, shipping, and more in our quick-help section.
How do you ship?
Most orders ship with UPS or Canpar (Canada Post for PO Boxes). A tracking number is emailed when your package is ready. Shipping is added automatically at checkout. In Canada: free shipping on regular-price orders over $150 for select categories; otherwise $30. Fixed-rate exceptions: $30 (sale items—some exceptions; backpacks/haul bags, climbing ropes, climbing/ski helmets, ski & hiking poles) and $40 (skis, avalanche airbags, ice/winter mountaineering boots). We don’t mail avalanche airbag cartridges.
Can I get my order faster?
Yes you can. If you want your order to ship faster, you can leave us a note when you do your purchase online. We will then get a quote from Canada Post and will contact you with the shipping costs. Please note that we are not responsible for shipping costs when you want it expedited. You will have to cover all the cost for this shipping method.
Do you ship internationally?
U.S. shipping: base rate $40 CAD, no free shipping outside Canada, and U.S. tariffs may apply based on country of manufacture. U.S. fixed-rate items: $40 CAD (sale items—some exceptions; hiking boots, 3-season mountaineering boots, climbing ropes, backpacks, climbing/ski helmets, ski & hiking poles), $50 (skis, ski boots, avalanche airbags), $80 (ice/winter mountaineering boots). Other countries aren’t mentioned.
Recently viewed products
Subscribe
Be the first to know about new gear, exclusive deals, and local mountain updates—straight to your inbox.